We want it set up so that each administrator of the shopping cart is using two-factor authentication (“2FA”). This page describes how to set this up for your Username. This page describes a simple way to set it up with an app on their smart phone, and a more complicated way to set it up.
Simple way with app on smart phone. The simple way to set up 2FA for your Username on the shopping cart is to have one place where you do it. Most people choose to do it with an app on their smart phone. Most people pick Google Authenticator as the app. We will describe how to do it using Google Authenticator, but the steps are very similar if you use a different smart phone app that is not Google Authenticator.

Maybe you already have an authenticator app on your smart phone. If so, then you can skip this step. Otherwise, the first step is, you install Google Authenticator onto your smart phone. You already know how to install an app onto your smart phone. When you are done installing the authenticator app, or if you already have an authenticator app installed, proceed.
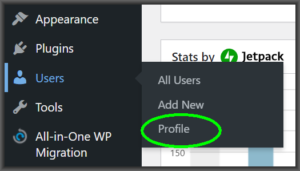
Now log in at the shopping cart using your administrator credentials. Go to the Dashboard and hover your cursor over Users and you can see Profile. Click on Profile.

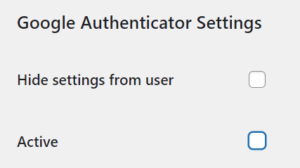
Your user profile will appear. Scroll down to the Google Authenticator area, where you will see something like this.

Check the “active” box. Now you will see something like this:

Type in a “Description”. This is what you will see in the Google Authenticator app on your phone. Make it something easy to recognize, like “OPLF shopping cart”. Click “Show QR code”. Scan the QR code with your Google Authenticator app.
Now scroll down and click the blue button “Update User”.
Now when you are logging in at the shopping cart, you will use not only your user ID and password, but you will also be using a time-based password from the Google Authenticator.
More complicated way. Some people choose to save their 2FA “Secrets” in some central location which they back up to several locations. They then copy the Secrets into several authenticator apps. This might include Winauth on a notebook computer and a Ubikey for use with a smart phone.
To proceed in this more complicated way, you follow the above steps up to the point where you might show the QR code. But instead of showing the QR code, you copy the “Secret” into a place (a data file) where you are saving all of your 2FA secrets for the various servers and sites for which you have 2FA set up. Now scroll down and click the blue button “Update User”.
Then you copy the “Secret” for this shopping art from the data file into your various authenticator apps.
Now when you are logging in at the shopping cart, you will use not only your user ID and password, but you will also be using a time-based password from any of your various authenticator apps.
